Domande frequenti per argomento
Monitoraggio del traffico web SpIDer Gate
A connection failure occurs when I try to download a program. If I turn off SpIDer Gate, downloading continues without interruptions. What shall I do?
Try running SpIDer Gate with the -dbg: 2 parameter. To do this, click Start-> Run, type in the string provided below:
"C:\Program Files\DrWeb\spidergate.exe" –dbg:2
Click Ok.
If the problem persists, please contact the technical support service.
Can the firewall do Spider Gate's work?
No, SpIDer Gate is an HTTP-monitor. It performs the following tasks:
- Scan incoming and outgoing HTTP-traffic
- Intercept all HTTP-connections
- Filter Data
- Block loading infected pages automatically in any browser
- Scan archived files
- Protect from phishing and other dangerous online resources.
At the same time the firewall protects your PC or network from unauthorized access.
Thus, SpIDer Gate and the firewall must operate simultaneously on your computer to protect your system against viruses and network attacks.
Does SpIDer Gate depend on my browser?
No. SpIDer Gate operates independently of the programs that use the Internet (including browsers).
Does operation of SpIDer Gate slow down web surfing?
Dr.Web anti-virus engine is so fast that SpIDer Gate won’t delay loading of web-pages or slow-down file transfers.
How can I configure SpIDer Gate's verbose log?
For version 5.0:
- Increase log file size up to 5 Megabytes. Right-click on the Dr.Web icon in the notifications area, select SpIDer Gate–>Settings, in the next window proceed to the Log tab and modify the File size limit field value.
- Right-click on the Dr.Web icon in the notifications area and select SpIDer Gate ->Disable.
- Press Start–>Run, copy one of the strings below to the Run field and launch SpIDer Gate:
- "C:\Program Files\DrWeb\spidergate.exe" -dbg — enable verbose logging,
- "C:\Program Files\DrWeb\spidergate.exe" -dbg -dbg — debug logging.
Version 6.0
Right-click on the Dr.Web icon in the notifications area and select SpIDer Gate–>Settings from the list (if this item is unavailable, you should first switch to the Administrator mode). In the next window, open the Log section and use the slider to set the Extended mode. Press Ok to confirm the changes made.

Further, if required, you can reproduce the problem that must be analysed using the extended report. Please keep in mind that the Debug log is not always required because redundant information might complicate troubleshooting.
How can I disable the SpIDer Gate HTTP monitor?
It is not recommended to disable the SpIDer Gate HTTP monitor because nowadays a lot of malware is distributed via infected websites. There are many script viruses and exploits that can cause harm to the system before they are saved to your hard drive and, consequently, detected by the SpIDer Guard® file monitor.
If disabling HTTP monitor is still necessary, right-click on the Dr.Web icon and in the next menu, select SpIDer Gate –> Disable. When anti-virus self-protection screen appears, type digits from the picture into the string and click Disable SpIDer Gate.
How do I disable the HTTP-monitor SpIDer Gate?
Right-click on the Dr.Web icon in the system tray and select SpIDer Gate-> Disable in the context menu.
Caution! It is not recommended to disable the HTTP-monitor SpIDer Gate because nowadays a lot of malware is distributed via infected web sites. There are many script viruses and exploits that can harm the system before they are saved to your hard drive and, consequently, detected by the file monitor SpIDer Guard.
How do I update the HTTP-monitor SpIDer Gate?
Since SpIDer Gate utilizes the Dr.Web engine and databases, it is updated automatically along with other anti-virus modules.
How is SpIDer Gate updated?
As other modules of the program Dr.Web, SpIDer Gate features the same anti-virus engine and uses the same virus databases and therefore is updated along with other modules.
The SpIDer Gate icon is red. What shall I do?
The red icon indicates that SpIDer Gate is disabled. To activate it, right click on the Dr.Web icon in the notification area. In the menu, hover over the SpIDer Gate item and in the drop-down list select Enable.
If the icon remains red, you have two options:
- Application error – in this case you need to contact the Technical support service.
- Your license does not cover SpIDer Gate. In this case, it is recommended to remove the component: Go to Start-> Settings-> Control Panel-> Add and Remove Programs, find the Dr.Web anti-virus on the list, click Modify and follow the wizard's instructions to disable this component.
This script should be used to answer users’ questions.
One of SpIDer Gate’s tasks is to inform users that visiting some websites is dangerous or undesirable, for reasons that include the presence of “pirated” content. Dr.Web informs users about such websites because they are accompanied by malicious programs. Websites are included in the so-called Dr.Web “anti-piracy” database only on the basis of allegations made by content copyright holders. Each allegation is verified by Doctor Web’s lawyers before the decision is made to include the corresponding URL in the database. When users receive SpIDer Gate notifications concerning the undesirability of visiting pirated websites, they are getting objective, legally considered information about intellectual property infringement. Thus, Doctor Web helps users of its products:
- avoid becoming the victims of criminals, who for their own selfish ends use others’ works and trademarks, and the fruits of others’ intellectual labours, for illegal purposes;
- avoid potential criminal indictment for downloading, using, and further distributing pirated content;
- protect PCs against infections occurring as a result of downloading unlicensed content that is accompanied by malicious programs.
Users make their own decisions as to whether it is worth visiting the websites they have been notified about. The SpIDer Gate component can be enabled or disabled at their discretion.
What is the impact of SpIDer Gate on the web-surfing speed?
The unique Dr.Web anti-virus engine allows SpIDer Gate to scan traffic so quickly that you will never notice any delay when viewing web pages and downloading files from the Internet.
When I try to go to some sites, SpIDer Gate blocks them and displays the message "URL is known as a source of infection." How can I disable this feature?
If you believe that SpIDer Gate has mistakenly blocked a respected site, please let us know through the form on our website.
If you need to access a suspicious site, right click on the Dr.Web icon in the system tray and in the context menu select SpIDer Gate-> Settings. Clear the Block known source check box and press Ok.
Caution! Disabling this option is not recommended, because pages from all sites, including potentially dangerous ones will be loaded without a corresponding warning.
Where can I find SpIDer Gate's log?
SpIDer Gate's log file name is spidergate.log. The file is located in the C:\Documents and Settings\Your_user_name\DoctorWeb folder.
Which browsers support SpIDer Gate?
SpIDer Gate is compatible with all web-browsers.
Dr.Web anti-virus engine is so fast that SpIDer Gate won’t delay loading of web-pages or slow-down file transfers.
Why do I need the Speed balance option?
The Speed balance option allows you to adjust the amount of CPU time utilized to scan Internet traffic. The higher the scanning priority, the more CPU resources it will use, but it will help maintain high speed connectivity. Low priority results in low CPU load and slower network communication speed. Changing the default value usually is not required.
Perché Dr.Web Security Space letteralmente divora il traffico? Il traffico del componente dell'antivirus dwnetfilter supera tutto il resto del traffico internet.
Il componente in realtà non consuma traffico. Il traffico passa attraverso questo componente. Quante applicazioni si sono connesse alla rete, quanti dati sono stati ricevuti/inviati tramite la rete, tanto traffico elaborerà il componente.
Tecnicamente si vede così:
Per fornire il controllo del traffico, l'antivirus installa nel sistema protetto i suoi filtri del traffico internet come se fosse un proxy. E questo filtro deve essere il primo in modo che il programma malevolo non possa elaborare per primo il traffico. Ad esempio, ai fini di occultamento della propria trasmissione di dati. Anche i sistemi di monitoraggio di terzi inseriscono filtri di conteggio simili, ma elaborano il traffico dopo il filtro dell'antivirus in quanto tali filtri funzionano sempre in sequenza. Pertanto, il processo dwnetfilter sarà visto come il principale consumatore di traffico.
Il dwnetfilter stesso non va su internet di propria iniziativa, intercetta solo le connessioni degli altri.
Per eliminare il falso effetto del consumo traffico da parte del componente dwnetfilter, è necessario escluderlo dal tracciamento da parte del programma di monitoraggio traffico utilizzato, se esiste tale possibilità. Non ha senso tracciare il traffico delle applicazioni separatamente, nonché il loro traffico complessivo attraverso un proxy (dwnetfilter).
Come aggiungere un sito alle eccezioni SpIDer Gate per Windows
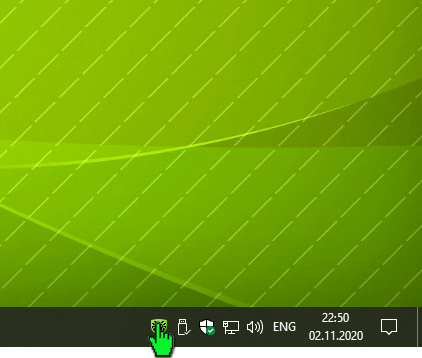
Fare clic sull'icona Dr.Web nell'area di notifica.
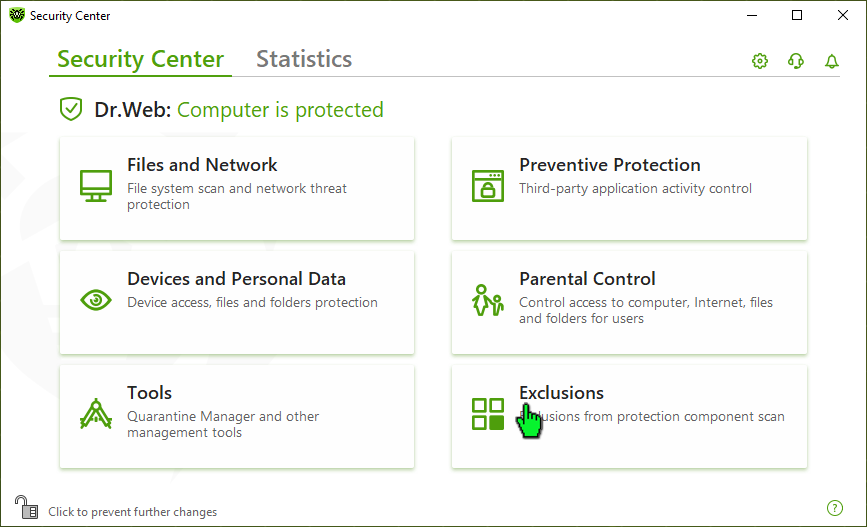
Aprire Centro sicurezza Dr.Web.

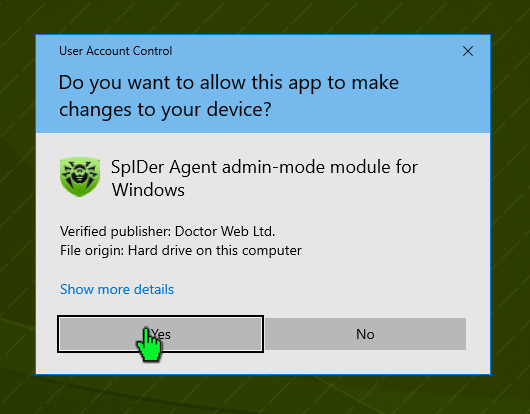
Per apportare modifiche alle impostazioni Dr.Web, sono necessari i permessi di amministratore Windows. Fare clic sul lucchetto per concederli.

Alla domanda sull'aumento dei permessi rispondere di sì.
Fare clic sul pulsante "Eccezioni".
Fare clic sul pulsante "Siti".
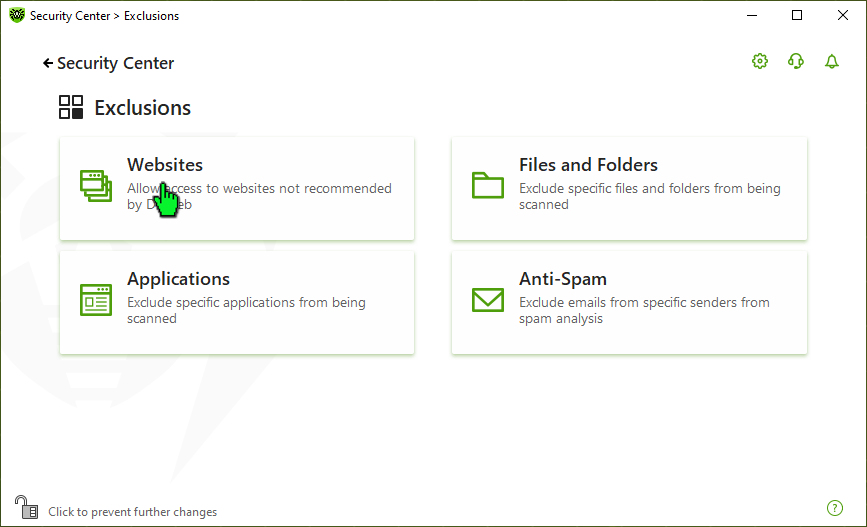
Aggiungere gli indirizzi dei siti l'accesso a cui si vuole consentire. Dopo aver inserito l'indirizzo di un sito, fare clic sul pulsante "+".
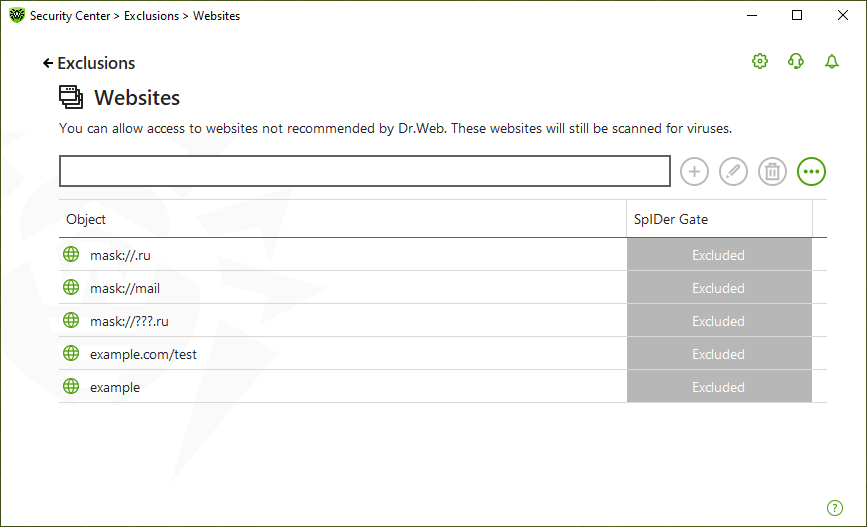
Per aggiungere alla lista un sito specifico, inserirne l'indirizzo (per esempio, www.example.com). L'accesso a tutte le risorse situate su questo sito sarà consentito.
Per consentire l'accesso a siti nei cui indirizzi è contenuto un determinato testo, inserire questo testo nel campo. Esempio: se si inserisce il testo example, sarà consentito l'accesso agli indirizzi example.com, example.test.com, test.com/example, test.example222.it e così via;
Per consentire l'accesso a un dominio specifico, indicare il nome del dominio con il carattere ".". In tale caso sarà consentito l'accesso a tutte le risorse situate su questo dominio. Se nell'indicazione del dominio si usa il carattere "/", la parte della sottostringa a sinistra del carattere "/" sarà considerata il nome a dominio e le parti a destra del carattere saranno considerate la parte dell'indirizzo consentito su questo dominio. Esempio: se si inserisce il testo example.com/test, saranno consentiti gli indirizzi example.com/test11, template.example.com/test22 e così via;
Per aggiungere alle eccezioni siti specifici, inserire una maschera che li definisce nel campo di input. Le maschere vengono aggiunte nel formato: mask://...
La maschera imposta la parte generale del nome oggetto, in particolare:
- il carattere "*" sostituisce qualsiasi sequenza di caratteri, anche una vuota;
- il carattere "?" sostituisce qualsiasi carattere, anche uno vuoto, ma uno solo.
Esempi:
mask://*.it/ — si apriranno tutti i siti nella zona .it;
mask://mail — si apriranno tutti i siti in cui è contenuta la parola "mail";
mask://???.it — si apriranno tutti i siti della zona .it di cui i nomi sono composti da tre caratteri o meno.
La stringa inserita al momento dell'aggiunta alla lista può essere trasformata in forma universale. Per esempio, l'indirizzo http://www.example.com verrà trasformato nel record www.example.com.
Nothing found